> ## Documentation Index
> Fetch the complete documentation index at: https://docs.meld.io/llms.txt
> Use this file to discover all available pages before exploring further.
# You KYC the User
> You integrate Sumsub to KYC the user
This guide is for developers who already KYC their users with Sumsub and want to reuse that verification with Meld onramps. You'll pass the user's Sumsub KYC token to Meld when creating a widget session, so the user can skip KYC on the onramp.
## Before you begin
* You have a Sumsub account and have integrated their KYC flow
* You have requested Meld enable Sumsub token sharing for your account
* You can obtain the Sumsub KYC token for each user
* You get a 1 time token from each onramp you use and add it to your Sumsub dashboard
* The onramp you plan to route to supports Sumsub token sharing (currently Mercuryo and Topper)
For sandbox testing details, see [KYC testing](/docs/stablecoins/sandbox-guide/kyc-testing).
**This flow works if you KYC the user via Sumsub and send them to the onramp Mercuryo or Topper.**
To enable this flow, do the following:
## Step 1: Sumsub Setup
This requires you to integrate [Sumsub](https://docs.sumsub.com/reference/about-sumsub-api), and use them to KYC your user.
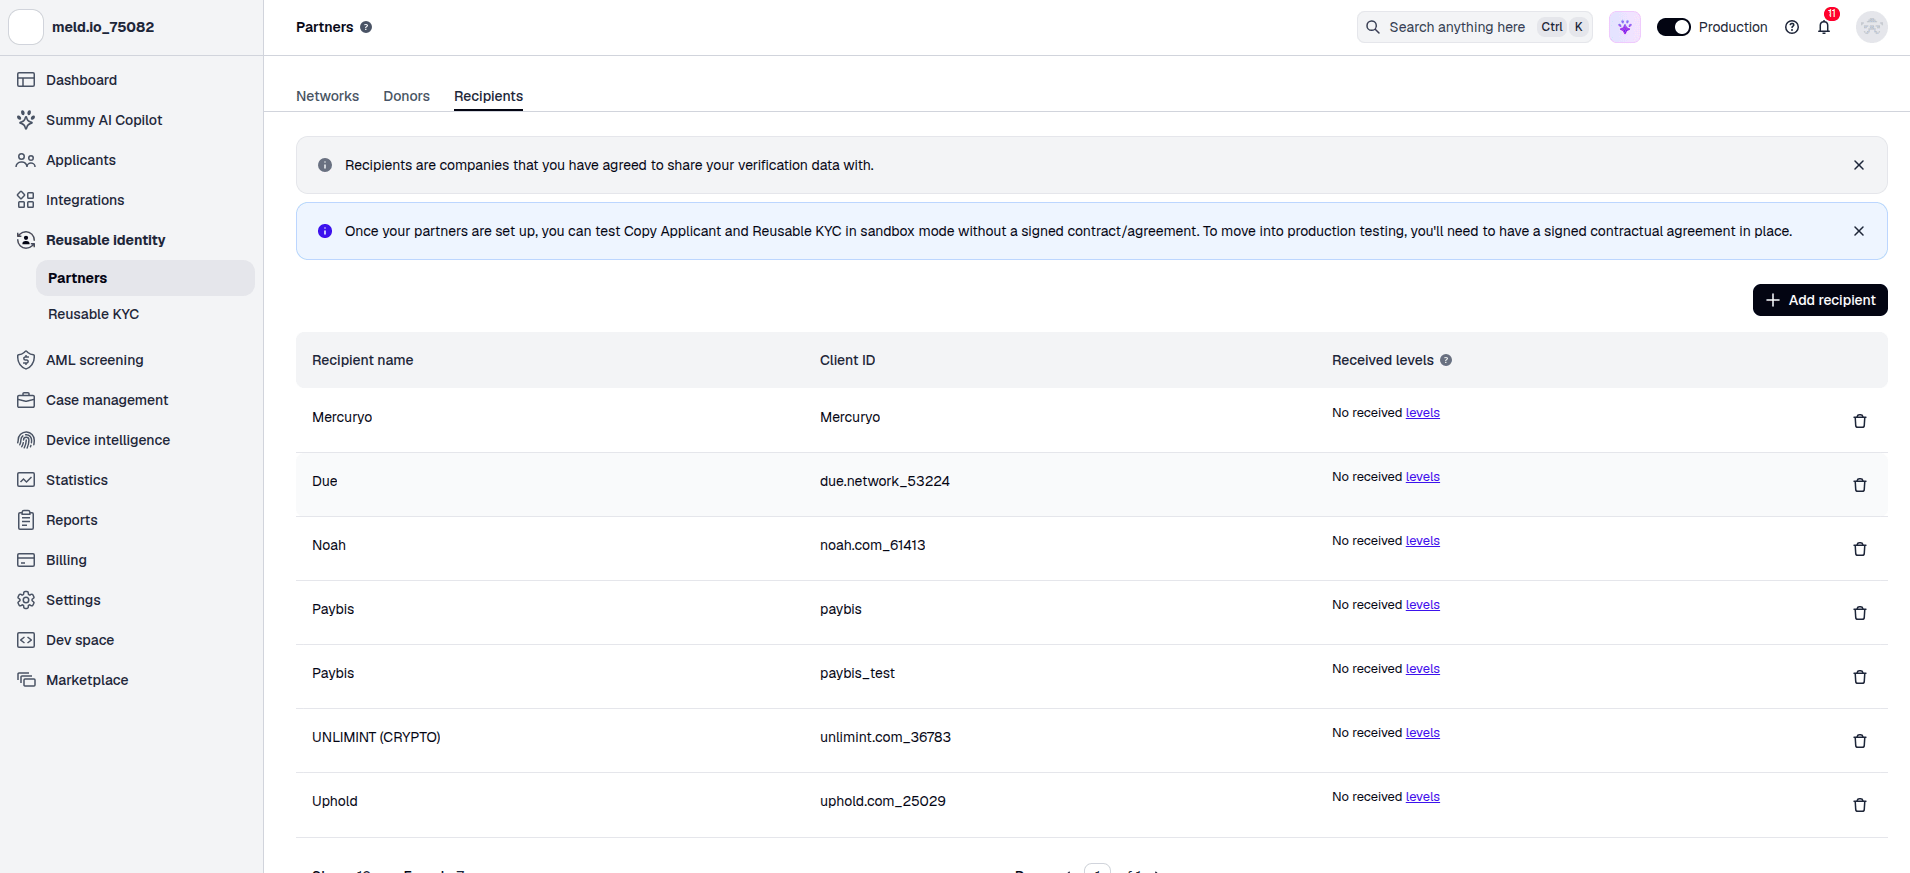
Get a share token from each onramp you will pass the Sumsub KYC token to (Mercuryo and Topper for example) and add them in your Sumsub dashboard in the Partners tab.
**It is very important that you show the user a screen where they consent to having their KYC data shared with another party (aka the onramps), which is what is happening in this flow. While Sumsub stores the physical KYC data, they will share it with the onramp for the user to skip KYC in the onramp, and the user must consent to this data sharing.**
[See Sumsub requirements for importing the applicant](https://docs.sumsub.com/docs/copy-applicant#how-to-enable-copy-applicant).
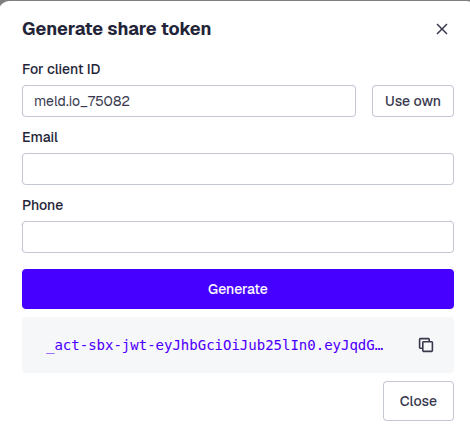
You will need to pass the Sumsub KYC token, generated for client id **meld.io\_75082**. This is done in the Sumsub dashboard, as shown below.
## Step 2: KYC the user via Sumsub
In order for your user to not be asked for any additional KYC information by the onramp, you must collect, at minimum,
1. Identity document (Driver's license, ID card, Residence permit, or Passport)
2. Selfie (advanced liveliness check)
3. Applicant data
* First name
* Last name
* Country
* Street
* Street (line 2)
* City
* State
* Postcode
* Nationality
* TIN / SSN
* Tax residence country
* Date of birth
* Phone Number
All of this must be under a KYC level named `network-partner-level2.`You will have to fetch the KYC token of the user from Sumsub.
## Step 3: Create a Meld customer
This step is required for the user to skip logging into the onramp, and is a one-time setup per user. Call `POST /accounts/customers` and pass in the user's first name, last name, email address, phone number, and birthday. Your request will look like this:
```json theme={null}
{
"name": {
"firstName": "First",
"lastName": "Last"
},
"email": "test@user.com",
"dateOfBirth": "01-30-1980",
"phone": "+1-111-222-3456",
"externalId": "testUser1" // optional, for you to pass in your own reference id for the user
}
```
The response body will look like this:
```json theme={null}
{
"name": {
"firstName": "First",
"lastName": "Last"
},
"email": "test@user.com",
"dateOfBirth": "01-30-1980",
"phone": "+1-111-222-3456",
"externalId": "testUser1",
"id": "W912345678", // customerId to pass into /widget
"key": "N/A",
"accountId": "W932jkkjn2jnjn",
"addresses": {},
"serviceProviderCustomers": {},
"subAccountId": "N/A"
}
```
The `id` in the response is now the Meld `customerId` of that user. You will need to pass this to Meld every time that user wants to make a transaction.
## Step 4: Pass Meld the KYC token
If you send the user to an onramp that supports Sumsub token sharing, pass Meld the KYC token of the user when you call `POST /crypto/session/widget`. Your request will look like this:
```json theme={null}
{
"sessionData": {
"countryCode": "US",
"destinationCurrencyCode": "BTC",
"serviceProvider": "MERCURYO",
"sourceAmount": "100",
"sourceCurrencyCode": "USD",
"walletAddress": "1EEo4ioA4spdJ2ZxiSQ1hWsp3Ve81ZRZ2F",
"kycInfo": { // optional field
"kycProvider": "SUMSUB",
"kycToken": "abcdefgh" // the Sumsub KYC token for the user
},
"sessionType": "BUY",
"customerId": "W912345678" // should be the same as the customer created above
}
```
The response will look like this:
```json theme={null}
{
"id": "WmYtVn52MCZkXQSdCFDU8N",
"externalSessionId": null,
"externalCustomerId": null,
"customerId": "WmYtVoa7bdzxJAT5ygt91s",
"widgetUrl": "https://meldcrypto.com?token=eyJhbGciOiJIUzI1NiIsInR5cCI6IkpXVCJ7.eyJpc3MiOiJtZWxkLmlvIiwiaWF0IjoxNzcxMjY3MDM4LCJzdWIiOiJjcnlwdG8iLCJleHAiOjE3NzEyNjg4MzgsImFjY291bnRJZCI6Ilc5a2c5aVAxc2JweVpwdFFEY0NNSnUiLCJzZXNzaW9uSWQiOiJXbVl0Vm41Mk1DWmtYUVNkQ0ZEVThOIn0.eqFYseggwUyv-F7WyO-LKEhwEqLiWVOmAV4lNjuth60",
"serviceProviderWidgetUrl": "https://exchange.mercuryo.io?widget_id=34c04adf-d04a-42de-a4aa-609a302b24tz¤cy=BTC&fiat_currency=USD&fiat_amount=100&address=1EEo4ioA4spdJ2ZxiSQ1hWsp3Ve81ZRZ2F&type=buy&network=BITCOIN&merchant_transaction_id=WmYtVmRXgDnavemEzb3k6K&redirect_url=https%3A%2F%2Fmeldcrypto.com&country_code=US&email&payment_method=card&signature=zxcvbnmasdfghjkl",
"token": "eyJhbGciOiJIUzI1NiIsInR5cCI6IkpXVCJ9.eyJpc3MiOiJtZWxkLmlvIiwiaWF0IjoxNzcxMjY3MDM4LCJzdWIiOiJjcnlwdG8iLCJleHAiOjE3NzEyNjg4MzgsImFjY291bnRJZCI6Ilc5a2c5aVAxc2JweVpwdFFEY0NNSnUiLCJzZXNzaW9uSWQiOiJXbVl0Vm41Mk1DWmtYUVNkQ0ZEVThOIn0.eqFYseggwUyv-F7WyO-LKEhwEqLiWVOmAV4lNjuth60"
}
```
If you executed every step correctly, then when you open either the `widgetUrl` or `serviceProviderWidgetUrl`, then the user goes straight to the Mercuryo payment screen, as seen in this demo video.
And that's it! Congrats, you are now using Meld's Unified KYC product to enhance your users' experience!
 **It is very important that you show the user a screen where they consent to having their KYC data shared with another party (aka the onramps), which is what is happening in this flow. While Sumsub stores the physical KYC data, they will share it with the onramp for the user to skip KYC in the onramp, and the user must consent to this data sharing.**
[See Sumsub requirements for importing the applicant](https://docs.sumsub.com/docs/copy-applicant#how-to-enable-copy-applicant).
You will need to pass the Sumsub KYC token, generated for client id **meld.io\_75082**. This is done in the Sumsub dashboard, as shown below.

## Step 2: KYC the user via Sumsub
In order for your user to not be asked for any additional KYC information by the onramp, you must collect, at minimum,
1. Identity document (Driver's license, ID card, Residence permit, or Passport)
2. Selfie (advanced liveliness check)
3. Applicant data
* First name
* Last name
* Country
* Street
* Street (line 2)
* City
* State
* Postcode
* Nationality
* TIN / SSN
* Tax residence country
* Date of birth
* Phone Number
All of this must be under a KYC level named `network-partner-level2.`You will have to fetch the KYC token of the user from Sumsub.
**It is very important that you show the user a screen where they consent to having their KYC data shared with another party (aka the onramps), which is what is happening in this flow. While Sumsub stores the physical KYC data, they will share it with the onramp for the user to skip KYC in the onramp, and the user must consent to this data sharing.**
[See Sumsub requirements for importing the applicant](https://docs.sumsub.com/docs/copy-applicant#how-to-enable-copy-applicant).
You will need to pass the Sumsub KYC token, generated for client id **meld.io\_75082**. This is done in the Sumsub dashboard, as shown below.

## Step 2: KYC the user via Sumsub
In order for your user to not be asked for any additional KYC information by the onramp, you must collect, at minimum,
1. Identity document (Driver's license, ID card, Residence permit, or Passport)
2. Selfie (advanced liveliness check)
3. Applicant data
* First name
* Last name
* Country
* Street
* Street (line 2)
* City
* State
* Postcode
* Nationality
* TIN / SSN
* Tax residence country
* Date of birth
* Phone Number
All of this must be under a KYC level named `network-partner-level2.`You will have to fetch the KYC token of the user from Sumsub.