Integration Quickstart
This quickstart is for developers integrating Meld’s White-Label API for the first time. You call Meld directly over REST withAuthorization: BASIC {apiKey} — there is no SDK or client framework to install. You’ll go from zero credentials to a completed sandbox buy and sell transaction in about 30 minutes.
Time required: 30 minutes
Difficulty: API knowledge required
Before you begin
- A Meld dashboard invitation (check your email)
- Ability to make authenticated REST calls (curl, Postman, or your language of choice)
- A publicly reachable webhook URL (optional; you can poll the API instead)
Base URLs:
https://api-sb.meld.io (sandbox) and https://api.meld.io (production). Sandbox credentials will not work in production and vice versa. All examples below use the sandbox URL.Authentication
Every request carries the same headers:Step 1: Get your API key
Your API key is required for all Meld API calls.1
Open the invitation
Check your email for the Meld dashboard invitation, click the link, and log in.
2
Navigate to API keys
In the dashboard at https://dashboard.meld.io, go to Developer → API Keys.
3
Reveal and copy
Click Reveal Key, then copy and store your API key securely.
Step 2: Set up webhooks
Webhooks notify your server when transactions are created and updated. This step can be completed later — you can pollGET /payments/transactions/{id} instead.
1
Add an endpoint
In the dashboard, go to Developer → Webhooks and click Add Endpoint.
2
Configure
Enter a publicly accessible webhook URL (http/https; localhost will not work), give it a descriptive name, and select Subscribe to all events.
3
Save
Click Add endpoint. You’ll now receive
TRANSACTION_CRYPTO_* events for all transaction creations and updates.For local testing, use a tunnel such as ngrok or webhook.site.
Pick a direction
Everything downstream is parameterized by a category:- Buy (on-ramp) —
CRYPTO_ONRAMP: the user pays fiat and receives crypto. - Sell (off-ramp) —
CRYPTO_OFFRAMP: the user sends crypto and receives fiat.
POST /payments/crypto/quote, POST /crypto/session/widget, and GET /payments/transactions/{id}. The session body uses the nested { sessionType, sessionData } shape in both cases. The differences are the source/destination ordering, the sessionType, and one extra step for sell (surfacing the deposit address).
This quickstart keeps discovery to the minimum needed. For full discovery (countries, default currencies, payment methods, and route limits via the
/network-partner/* endpoints), see the White-Label API Guide.Minimal buy in 4 calls
This is the fastest path to a completed on-ramp (CRYPTO_ONRAMP) sandbox transaction: quote → session → launch widget → poll status.
1. Get a quote
Request live quotes across providers. On the quote endpoint,sourceAmount is a number. For a buy, sourceCurrencyCode is the fiat the user pays and destinationCurrencyCode is the crypto they receive.
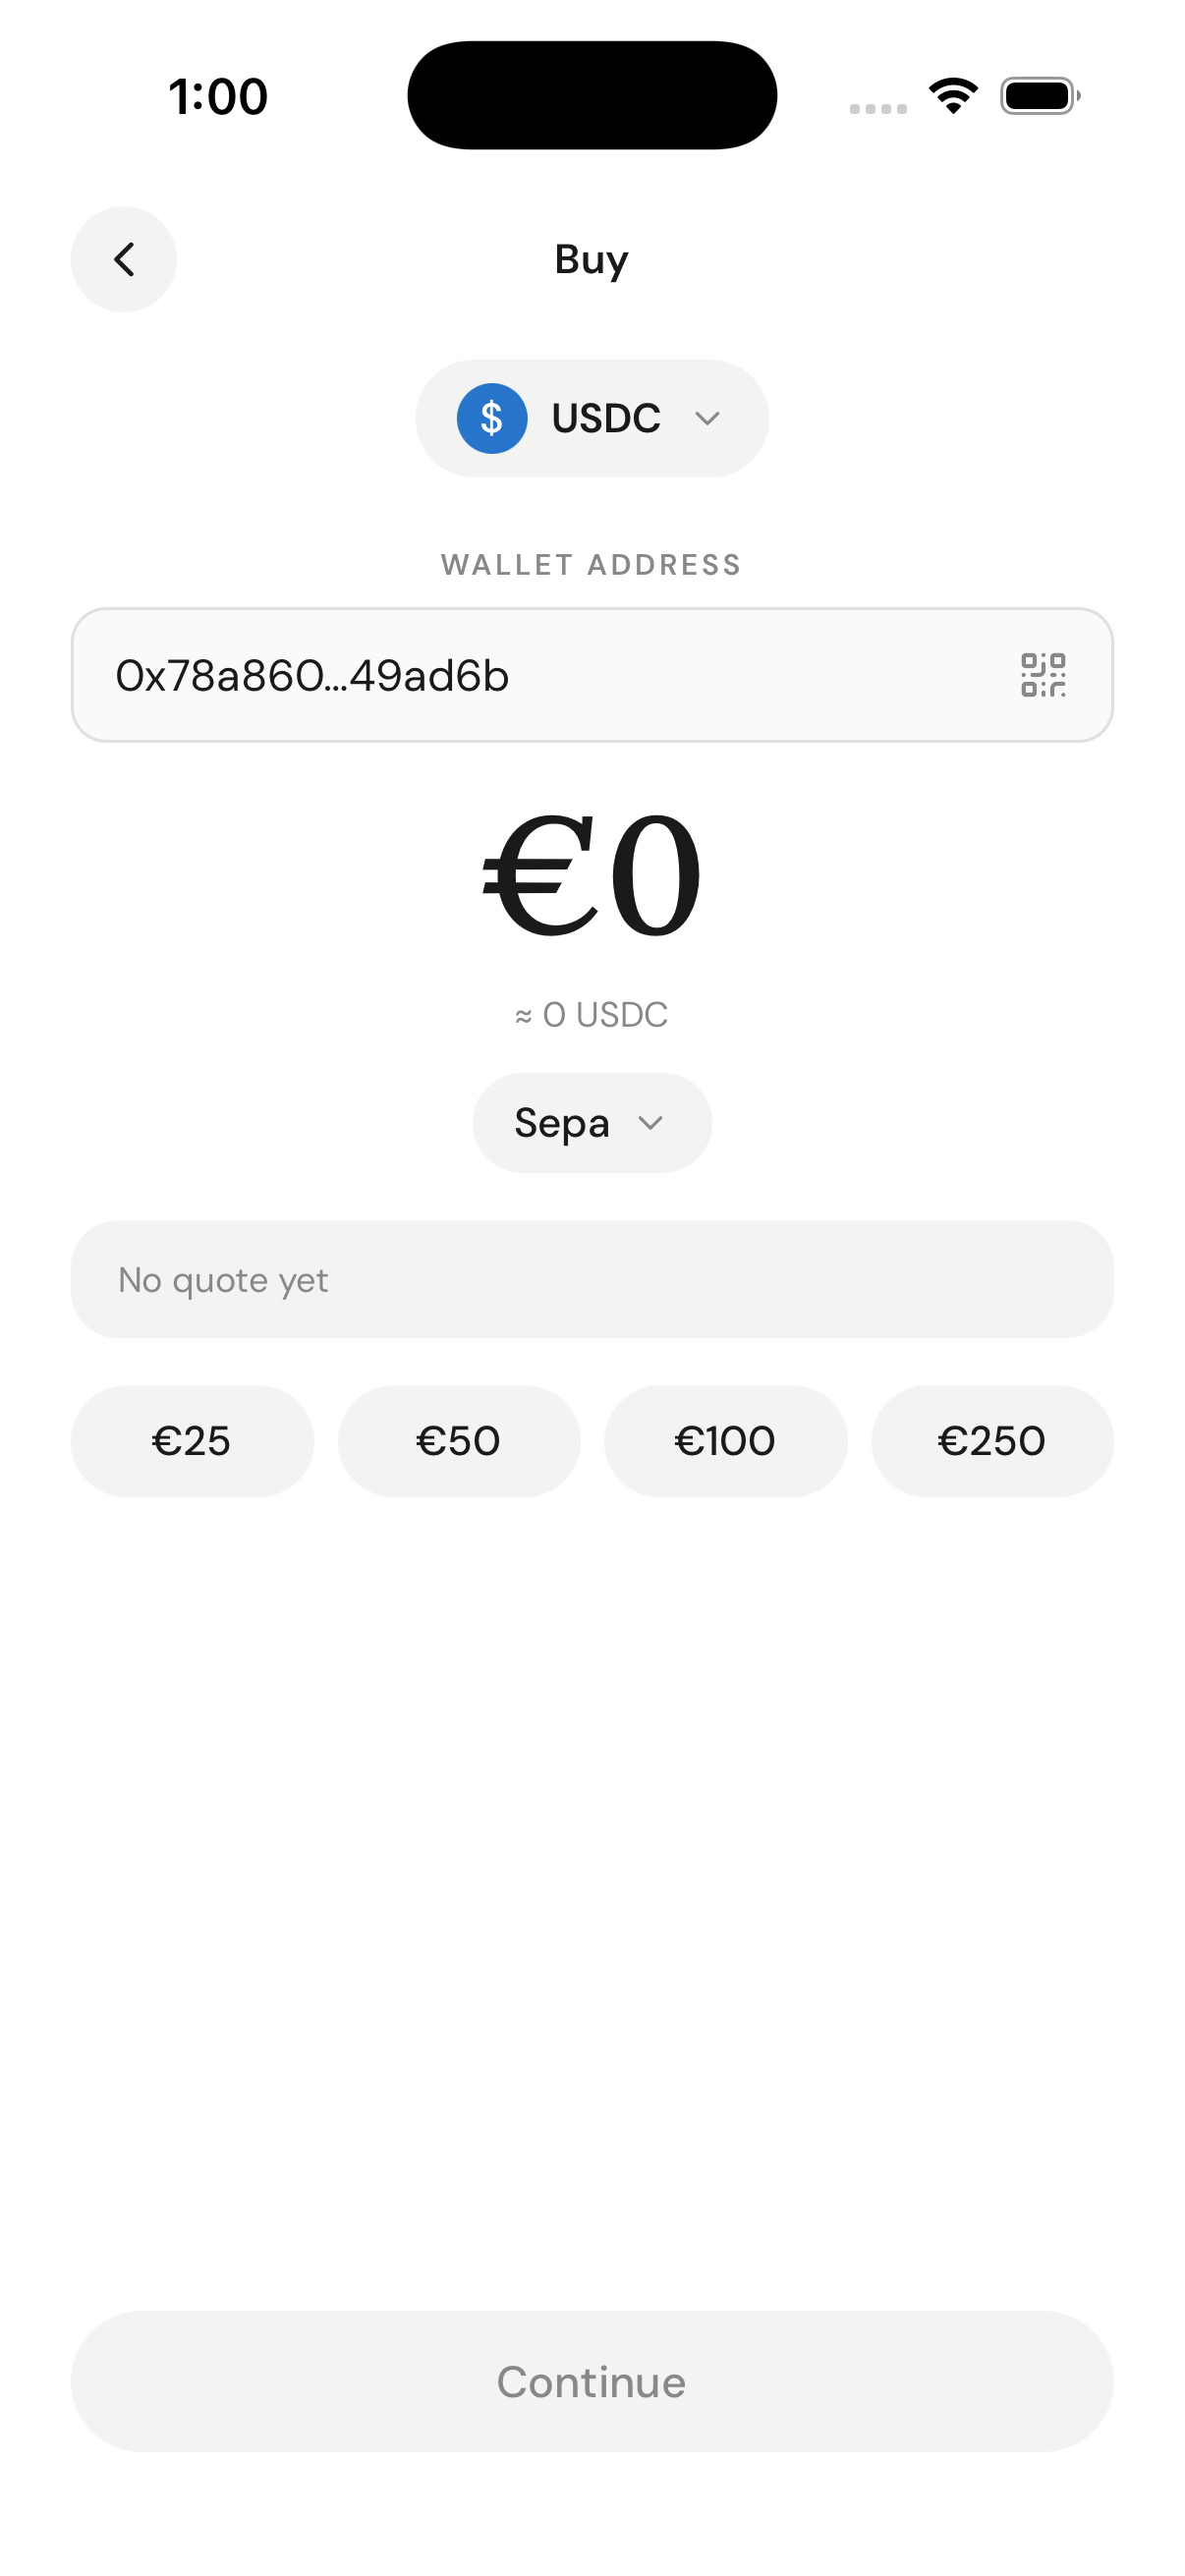
Buy (on-ramp): the user picks the crypto to receive, their wallet, the pay-with currency, and an amount — the inputs for the quote and session calls below.
serviceProvider and destinationAmount.
Rank quotes by
rampIntelligence.rampScore and lowKyc to pick the provider most likely to convert. See Ramp Intelligence.2. Create a widget session
Use the nested{ sessionType, sessionData } body. Set sessionType to BUY. Note that sessionData.sourceAmount is a string here (it was a number on the quote endpoint). For a buy, walletAddress is the user’s receive wallet.
serviceProviderWidgetUrl (the provider’s hosted checkout); widgetUrl is a Meld-hosted fallback.
3. Launch the provider widget
OpenserviceProviderWidgetUrl (popup or redirect on desktop, webview or redirect on mobile). The provider runs its own KYC and payment collection. Whitelist your redirectUrl domain so the provider can return the user to you on completion.
For sandbox KYC and payment, use the test values below:
- SSN: any fake number — ID upload: any image file
- Card number:
4111 1111 1111 1111— Expiry: any future date — CVV: any 3 digits
4. Poll the transaction status
When you receive aTRANSACTION_CRYPTO_* webhook (or to poll directly), call GET /payments/transactions/{transactionId}. Match the inbound event to your externalSessionId.
status (for example SETTLED), the source/destination amounts, the serviceProvider, and on-chain details under cryptoDetails. The tracking section below shows the full payload.
Minimal sell in 5 calls
A sell (CRYPTO_OFFRAMP) needs one discovery call to find a payout rail and its limits, then mirrors the buy flow with reversed currency ordering, sessionType: SELL, and an extra deposit-address step: routes → quote → session → launch → show deposit address → poll status.
1. Find a payout route (rail + limits)
For off-ramp, the route path is source = crypto, destination = fiat:GET /network-partner/supported/routes/{category}/{country}/{source}/{destination}.
name field (the canonical id, e.g. ACH) as paymentMethodType — never the display label. Validate the user’s amount against limits.min/limits.max.
The canonical-id field name differs by endpoint: on
supported/routes it’s name, while on the separate supported/payment-methods endpoint it’s method (and there name is the display label). Both carry the same ids — e.g. ACH, CREDIT_DEBIT_CARD.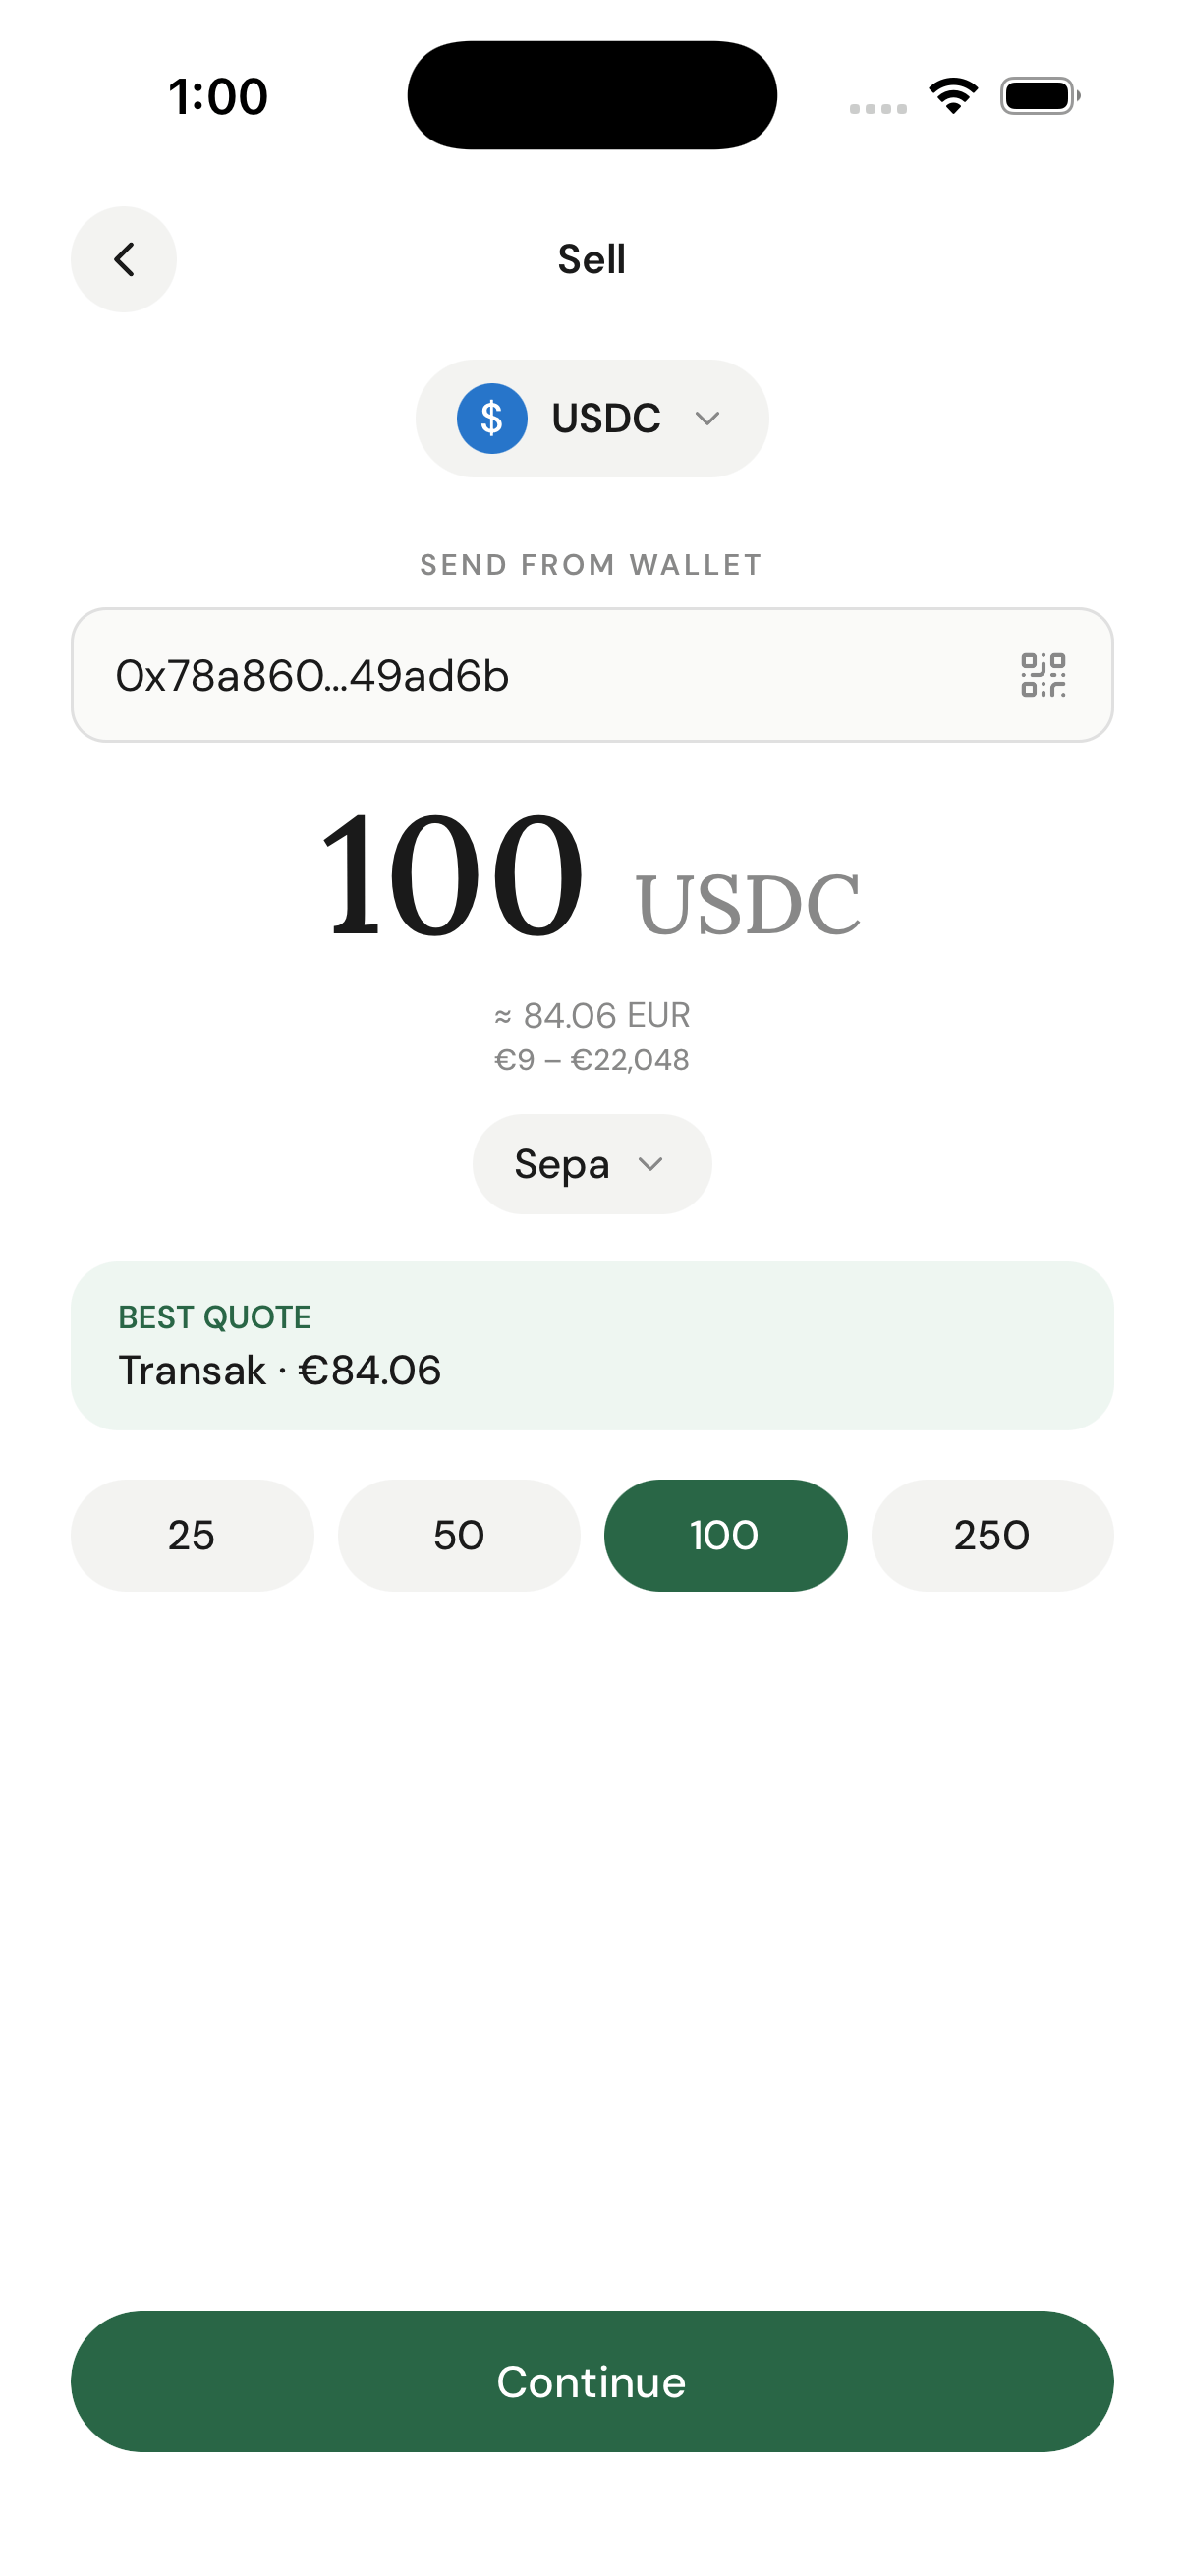
Sell (off-ramp): entering a crypto amount surfaces the live fiat payout, the route's min–max limits, the payout rail, and the best provider quote — all from the routes and quote endpoints.
2. Get a quote
For a sell, the currency ordering is reversed versus buy:sourceCurrencyCode is the crypto and destinationCurrencyCode is the fiat the user receives. sourceAmount is a number in crypto units.
serviceProvider. destinationAmount is the fiat the user will receive.
3. Create a widget session
Use the nested body withsessionType: SELL. The currency ordering matches the quote (crypto → fiat), and sessionData.sourceAmount is a string. Here walletAddress is the user’s own send-from wallet (the source of the crypto), not a deposit address.
serviceProviderWidgetUrl.
4. Launch the provider widget
OpenserviceProviderWidgetUrl. The provider collects the user’s payout-bank details and runs KYC.
5. Show the deposit address, then poll
After the widget completes, fetch the transaction (bytransactionId, or look it up by your externalSessionId) to read the provider’s deposit address — the address the user must send crypto to.
GET /payments/transactions/{transactionId} until status settles. destinationAmount is the fiat paid out and cryptoDetails.blockchainTransactionId is the on-chain transfer.
Track the transaction
Both directions report status the same way. When you receive aTRANSACTION_CRYPTO_* webhook, extract paymentTransactionId and call GET /payments/transactions/{transactionId}.
Webhook payload
Transaction detail
cryptoDetails.destinationWalletAddress / offrampDestinationWalletAddress) and the fiat payout under destinationAmount.
Dashboard verification
- Navigate to the Transactions tab.
- If your transaction isn’t visible, click the Status dropdown and select Select All.
- Wait a few seconds and refresh.
Next steps
- White-Label API Guide — full discovery (
/network-partner/*countries, defaults, currencies, payment methods, routes) and the complete on-ramp and off-ramp walkthroughs. - Ramp Intelligence — rank quotes to improve success rates.
- White-Label Customization — theme the provider experience and lock fields.
- Supporting multiple downstream applications — multi-app setups.
- Transaction statuses — the full status lifecycle (
PENDING→SETTLING→SETTLED, plusFAILED/CANCELLED).
Troubleshooting
🚫 401 Unauthorized
- Ensure
BASICis added before your API key. - Check for extra spaces or incorrect formatting.
🚫 Empty routes (200 [])
- You likely reversed the source/destination order. For sell it is crypto → fiat (
.../CRYPTO_OFFRAMP/US/USDC/USD); for buy it is fiat → crypto. - Confirm the
category,country, and currency pair are all supported for that direction.
🚫 NO_VALID_QUOTES
- You sent a rail that isn’t valid for the country/currency. Send the canonical
paymentMethodType(the route’sname, e.g.ACH), never a display label. - Check the amount is within the route’s
limits.min/limits.max.
🚫 Webhook not received
- Verify the URL is publicly accessible and returns a 200 status.
- Check firewall settings, or poll
GET /payments/transactions/{id}instead.
🚫 Transaction not visible
- Change the status filter to Select All in the dashboard.
- Wait 30 seconds and refresh.
- Confirm you’re using the correct environment (sandbox vs production).