

Build Your Own UI with Meld APIs
This guide is for developers building a custom crypto interface on top of Meld’s White-Label API. You call Meld directly withAuthorization: BASIC {apiKey} and own every screen — country selection, amounts, payment methods, quotes, and transaction tracking — while Meld handles pricing, provider routing, sessions, and webhooks, and the selected provider handles KYC, payment collection, and compliance.
You’ll learn the exact sequence of API calls for both directions:
- On-ramp (buy) — fiat → crypto,
category = CRYPTO_ONRAMP, sessionBUY. - Off-ramp (sell) — crypto → fiat,
category = CRYPTO_OFFRAMP, sessionSELL.
Before you begin
- ✅ API key from the Meld dashboard (see White-Label Quickstart Step 1)
- ✅ Webhook endpoint configured (recommended; you can also poll the API)
- ✅ Basic understanding of REST APIs and JSON
- ✅ Sandbox environment — base URL
https://api-sb.meld.io(production ishttps://api.meld.io)
https://api-sb.meld.io until your flow is ready, then switch credentials and the base URL to https://api.meld.io to go live.Technical Architecture
Your UI talks only to Meld’s APIs for discovery, pricing, and sessions. When the user is ready to pay (buy) or get paid (sell), you hand off to the selected provider’s hosted UI, then track the result through webhooks and the transactions endpoint.The discovery model
All discovery is parameterized by acategory. Retail ramp uses exactly two:
Upgrading from the Service Provider API?
If you previously integrated against the legacy/service-providers/* discovery endpoints, they are deprecated and slated for removal, and are replaced by the category-scoped /network-partner/* family used throughout this guide. Migrate as soon as you can — see the migration guide.
The three transaction endpoints are unchanged: POST /payments/crypto/quote, POST /crypto/session/widget, and GET /payments/transactions/{transactionId}.
CRYPTO_ONRAMP_SWAP / CRYPTO_OFFRAMP_SWAP) and virtual-account categories also exist but are out of scope for this retail buy/sell guide.Discovery endpoint reference
These five endpoints back both flows. Each example shows the on-ramp and off-ramp variant so you can see where shapes and ordering differ.Supported countries
- The set of countries can differ by direction.
flagis a hosted image URL, not an emoji — render it as an<img>.subdivisionsreturns ISO 3166-2 codes (e.g.US-CA) when a country has regional coverage differences. Collect the user’s state/region and pass it assubdivisionto Supported routes.
Country defaults
US) and category (CRYPTO_ONRAMP or CRYPTO_OFFRAMP) are path params. Returns a single object with the preselected pay-with / payout currency and payment methods for that country.
/network-partner/supported/currencies and /network-partner/supported/payment-methods if the response omits a field for a given country/category.Supported currencies
type.
{ currencyCode, name, decimalPlaces, type, symbol, chainCode?, contract? }.
currencyCode— the ticker/id you send downstream (e.g.USD,USDC).decimalPlaces— use for client-side formatting of the amount input.symbol— a hosted image URL for the currency logo (not a ticker). Render as an<img>.chainCode/contract— disambiguate tokens on multi-chain networks.
Supported payment methods
{ countryCode, providerMethod, method, name, type, logo?, headlessSupported? }.
method— the canonical id (e.g.ACH,SEPA,CREDIT_DEBIT_CARD). This is the value you send downstream aspaymentMethodType.name— human-readable display label (“ACH Bank Transfer”). Never sendnameto Meld.headlessSupported—trueif the rail supports a headless (server-to-server, no provider UI) checkout for this method. Prefer these when your flow doesn’t need the provider’s hosted UI.
Supported routes
- On-ramp:
source = fiat,destination = crypto→.../CRYPTO_ONRAMP/US/USD/USDC - Off-ramp:
source = crypto,destination = fiat→.../CRYPTO_OFFRAMP/US/USDC/USD
route.paymentMethods[].limits for the chosen partner + method. The currencyCode on limits tells you which currency the min/max are expressed in: for on-ramp it’s the fiat the user pays; for off-ramp it’s the fiat the user receives. Because limits live on the route, a buy route and a sell route for the same pair can have different min/max.kycLimits — an optional array of tier-based limits that some partners apply on top of the per-method limits (e.g. higher caps after enhanced KYC). Usually empty; treat as advisory unless a partner returns entries.On-ramp flow (buy)
category = CRYPTO_ONRAMP throughout. Currency flow is fiat → crypto, session type is BUY.
Resolve country and defaults
Load fiat and crypto options
decimalPlaces to format the amount input, currencyCode/name for the label, symbol (image URL) for the logo, and chainCode/contract to disambiguate multi-chain tokens.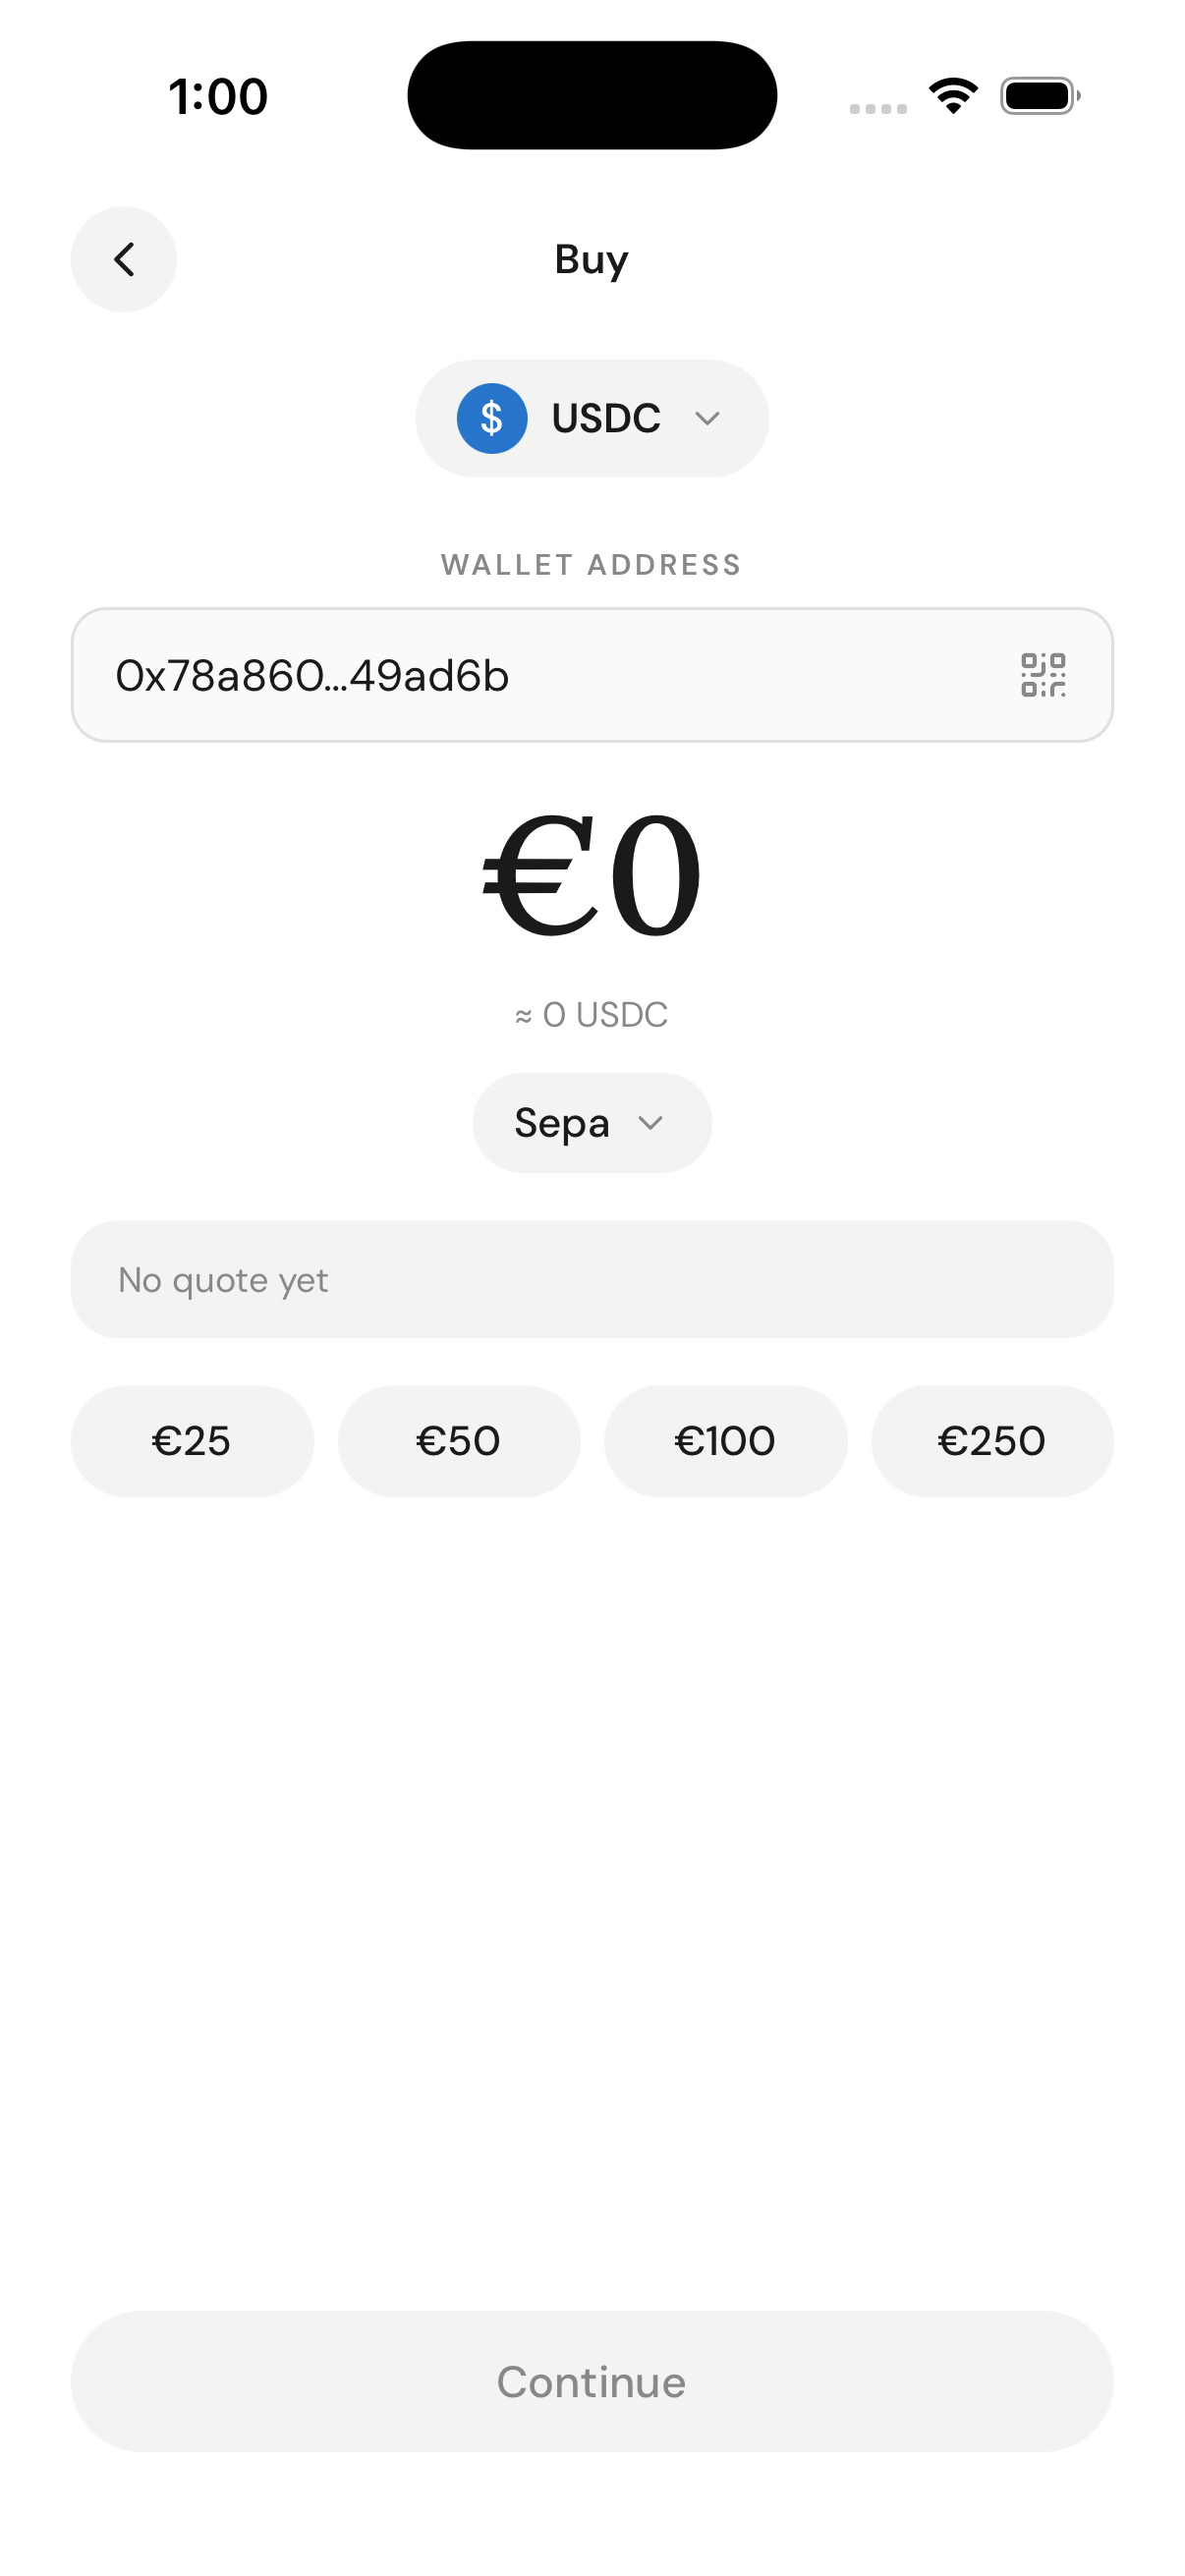
On-ramp amount entry: the crypto buy-asset selector, destination wallet, pay-with currency, and quick-amount chips — the inputs assembled from the discovery calls above.
Get routes for the chosen pair (methods + limits)
subdivision for the US state when applicable.route.paymentMethods[].name (the rails), ...limits.{min,max,currencyCode} (validate the amount), partner, and headlessSupported. Alternatively (or in addition), list rails explicitly:method/name id you send as paymentMethodType.Fetch a real-time quote
walletAddress on the request — Ramp Intelligence keys off the destination wallet address (not customerId / externalCustomerId) to rank quotes for the user. On this endpoint sourceAmount is a number.sourceCurrencyCode is fiat and destinationCurrencyCode is crypto. Rank the returned quotes[] by rampIntelligence.rampScore (see Quote ranking), then let the user pick. Capture the chosen quote’s serviceProvider.serviceProviders: ["TRANSAK", "BANXA"] array on the request body to restrict which providers can quote (allow-list). Omit it to receive quotes from every provider linked to your API key.Create the widget session
{ sessionType, sessionData } body. On this endpoint sessionData.sourceAmount is a string (it was a number on the quote endpoint).sessionData.clientIpAddress. Pass the end user’s public IP (not your server’s). Both IPv4 and IPv6 are accepted. Some ramp providers reject or fail sessions without it because they use it for geo and fraud checks; sending it by default keeps the widest set of providers routable.If you don’t already track the user’s IP, resolve it client-side with a free lookup like https://api.ipify.org (or an equivalent paid service) and forward it to your backend before creating the session.serviceProviderWidgetUrl (preferred — the provider’s hosted checkout), widgetUrl (Meld-hosted fallback), token, id, and externalSessionId.Launch the provider UI and track the result
serviceProviderWidgetUrl (popup or new tab on desktop; redirect on mobile). The provider runs its own KYC and collects payment. Completion is signaled by your redirectUrl and/or postMessage, but authoritative status comes from webhooks. See Launch provider UI and Track the transaction.Off-ramp flow (sell)
category = CRYPTO_OFFRAMP throughout. Currency flow is crypto → fiat, session type is SELL. The structural differences from buy are flagged inline.
Resolve country and defaults
currencyCode) and payout rail (paymentMethods[]).Load sellable crypto and payout fiat options
type=CRYPTO list is what the user can sell; the type=FIAT list is what they can receive. Use decimalPlaces to format the crypto-units input and show a ≈ fiat preview.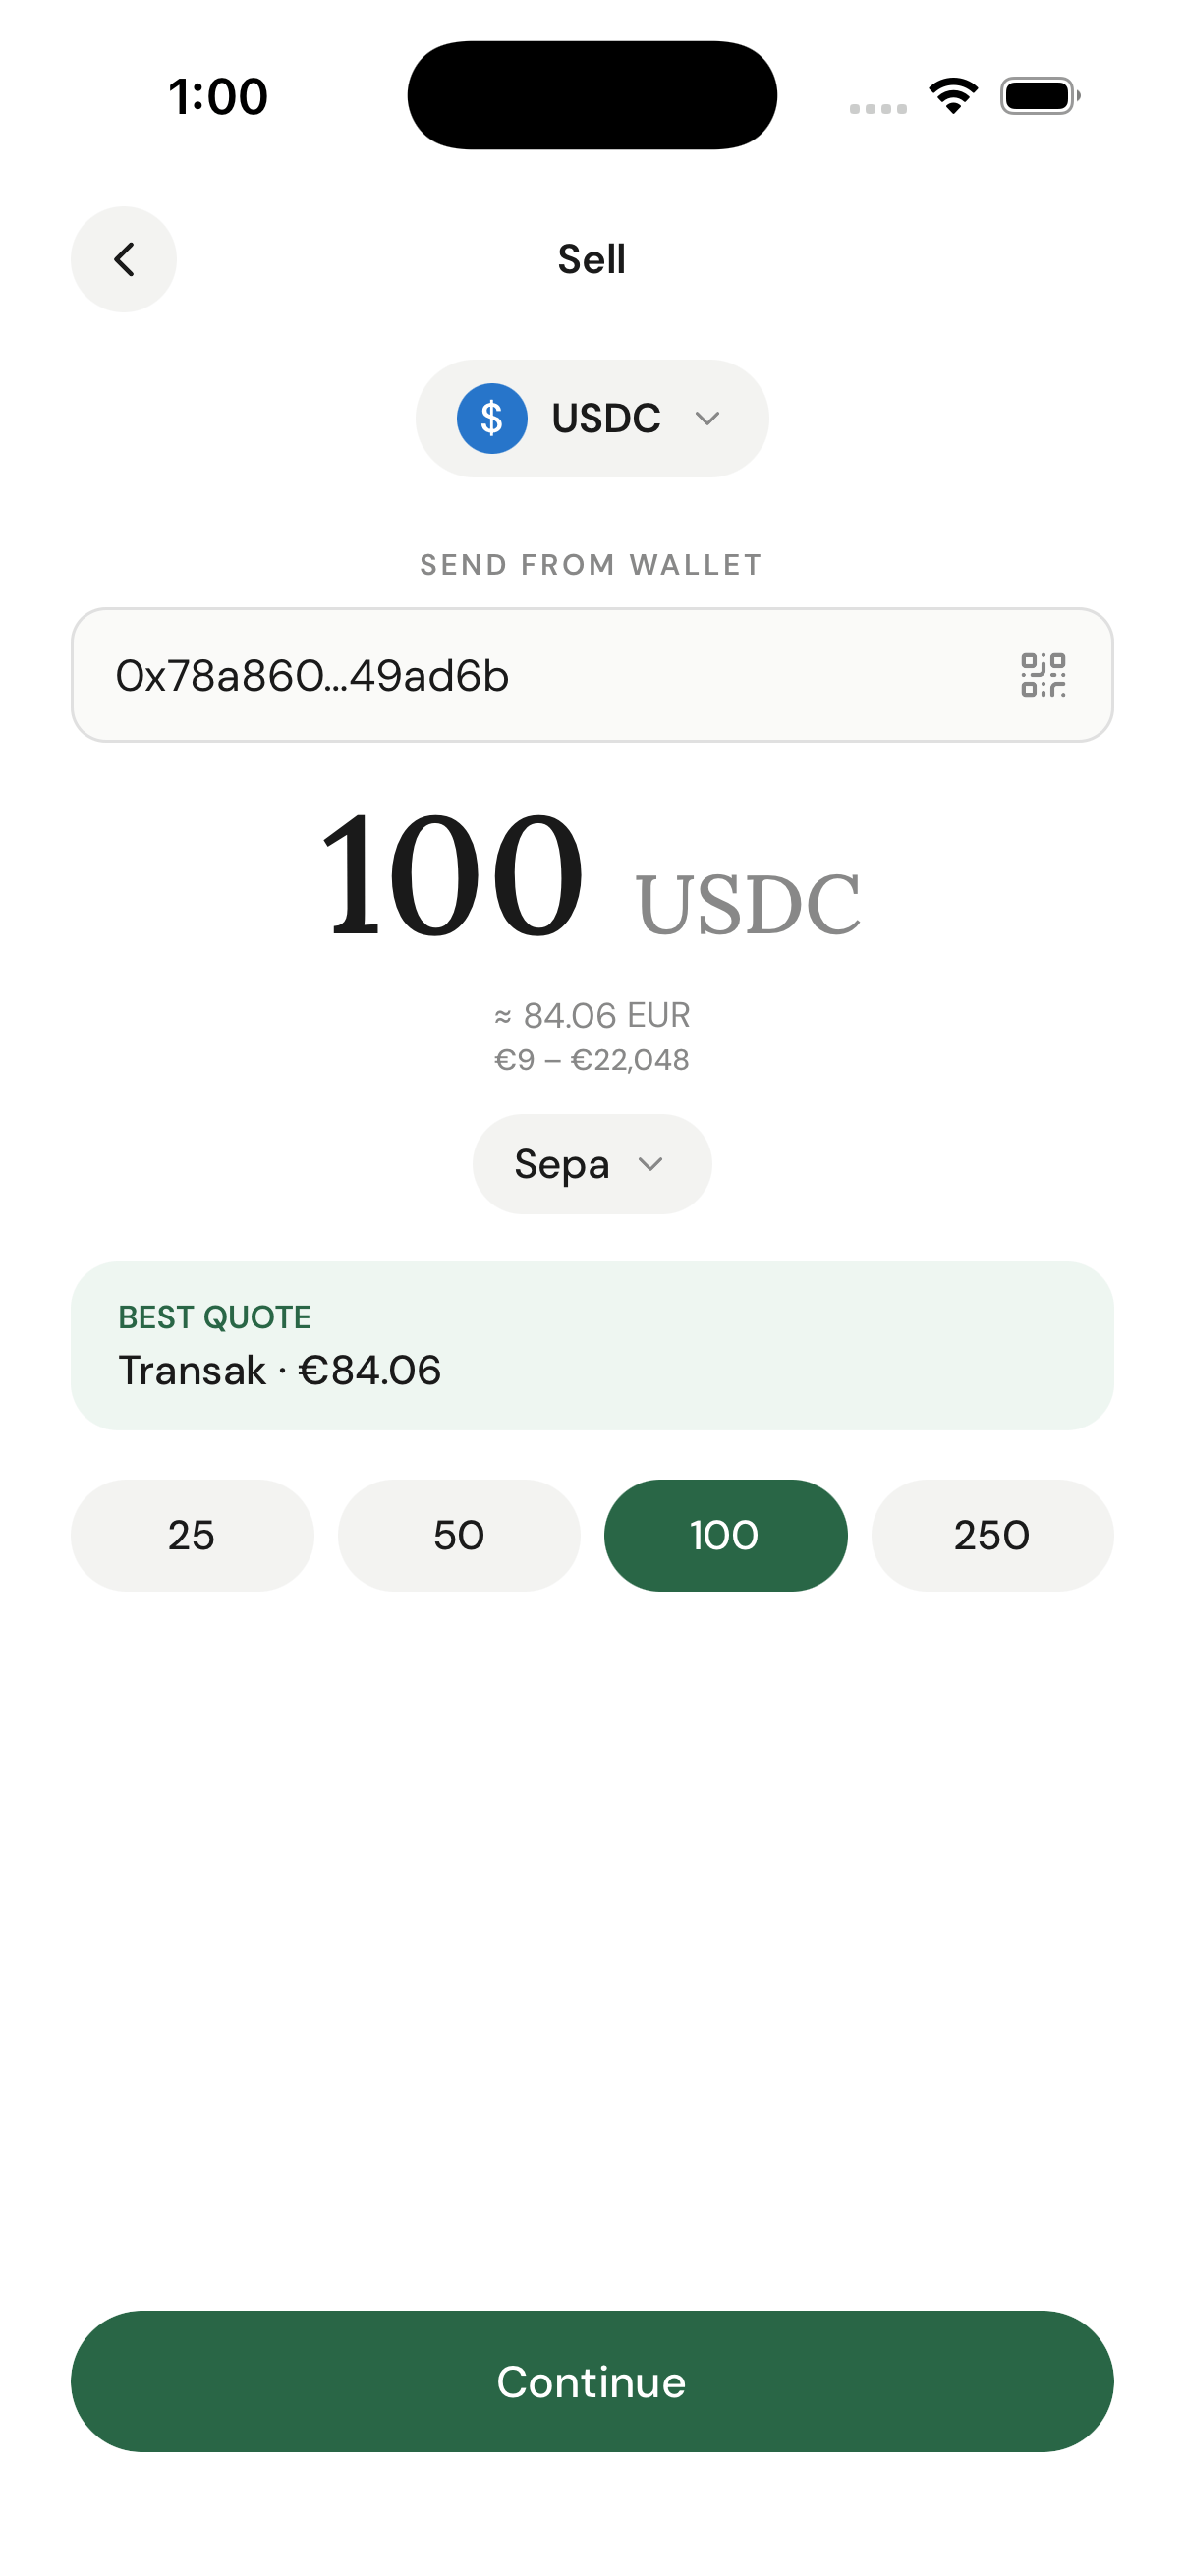
Off-ramp amount entry: the crypto-units input shows a live ≈ fiat payout, the route's min–max limits, the selected payout rail, and the best provider quote — populated from supported/routes and /payments/crypto/quote.
Get routes — CRYPTO → FIAT ordering
route.paymentMethods[].name (payout rails), ...limits (validate the amount), and partner.Select a payout method
currencyCode here is the payout fiat. Choose a payout rail and send its method (e.g. ACH, SEPA, LOCAL_BANK_TRANSFER, PAYOUT_TO_CARD) as paymentMethodType — never name. Prefer a headlessSupported rail when offered.Fetch a quote — reversed currency ordering
sourceCurrencyCode is crypto, destinationCurrencyCode is fiat. sourceAmount is a number in crypto units.destinationAmount on each quote is the fiat the user receives. Capture the chosen quote’s serviceProvider.Create the session, launch, and surface the deposit address
sessionType: "SELL". Here sessionData.walletAddress is the user’s own wallet (the one they send crypto from / are refunded to) — not a deposit address. sourceAmount is a string.sessionData.clientIpAddress here for the same reason as on-ramp — some providers require the end user’s IP for geo and fraud checks (see the on-ramp note).Open serviceProviderWidgetUrl; the provider collects payout-bank details and runs KYC. After the widget completes, fetch the transaction (or look it up by your externalSessionId) and read the deposit address from cryptoDetails.destinationWalletAddress (offrampDestinationWalletAddress on API versions before 2025-03-04):Quote ranking (Ramp Intelligence)
POST /payments/crypto/quote returns multiple provider quotes. Each carries a rampScore (via rampIntelligence.rampScore) representing the likelihood of transaction success based on historical conversion rates, provider reliability, location and payment-method compatibility, and real-time provider performance.
rampScore— Meld’s recommendation score (higher = better conversion likelihood).lowKyc— whether the provider requires minimal identity verification.
rampScore quote first to maximize transaction success rates. For off-ramp, the same ranking applies — just compare destinationAmount (fiat received) as the tie-break.📊 Learn More: See Ramp Intelligence for advanced ranking strategies.Launch the provider UI
When the session is created, open the provider’s payment UI in a webview, new tab, or redirect.widgetUrl returns a Meld URL that iframes the provider’s URL (or full-redirects for providers that block iframing). serviceProviderWidgetUrl returns the provider’s URL directly. You can launch either; we recommend serviceProviderWidgetUrl. The only difference between buy and sell is the sessionType you sent when creating the session.- Desktop
- Mobile
redirectUrl. Track transaction status through webhooks, not redirect handling.Track the transaction
Monitor progress and update your UI as the user completes the flow.externalSessionId.
{ "transaction": { ... } }. The inner object carries status, amounts, and a cryptoDetails block. Wallet fields are direction-dependent: destinationWalletAddress is where the crypto goes (the user’s wallet on on-ramp, the provider’s deposit address on off-ramp), and sourceWalletAddress is where it comes from (the user’s wallet on off-ramp). Versions before 2025-03-04 return walletAddress and offrampDestinationWalletAddress instead — see Off-ramp flow Step 6.
cryptoDetails.destinationWalletAddress) used in the sell flow. See Off-ramp flow Step 6.Status Reference: See Transaction Statuses for complete definitions.API response caching guide
Cache static discovery data; never cache pricing, sessions, or transaction state.category, country, type, currencyCode, and (for routes) source/destination/subdivision — so a buy cache entry never serves a sell request.
Best practices & tips
Performance
- Cache static discovery for up to 1 week; keep
supported/routeson a short TTL because limits change. - Debounce quote requests while the user types an amount.
- Preload country/currency data on app startup.
User experience
- Show loading states during API calls.
- Display fees clearly before the user commits.
- Validate amounts against
route.paymentMethods[].limitsin the correct currency. - Handle errors gracefully with retry options.
Error handling
Security
- Never expose API keys in frontend code — proxy Meld calls through your backend.
- Validate all user inputs before API calls.
- Use HTTPS only for API communications.
- Implement rate limiting to prevent abuse.
Next steps
Testing your implementation
- Sandbox testing credentials — test cards, wallets, and KYC triggers
Advanced features
- Webhook events — real-time updates
- Dashboard data — track performance
- Ramp Intelligence — improve success rates
Production deployment
- Service-provider setup — configure additional providers
Support & resources
- FAQ — common questions answered