
Step 2: Launch the Widget
Meld Connect Widget
Overview
The Meld Connect Widget is where your customer will select a financial institution to connect with. Once your customer has connected their bank account, you can then use our other endpoints (described later) to pull information from their accounts.
The Meld Connect Widget contains two components:
-
Front-end component -- Use to select the financial institution.
-
Back-end component -- Use to access the customer’s financial data.
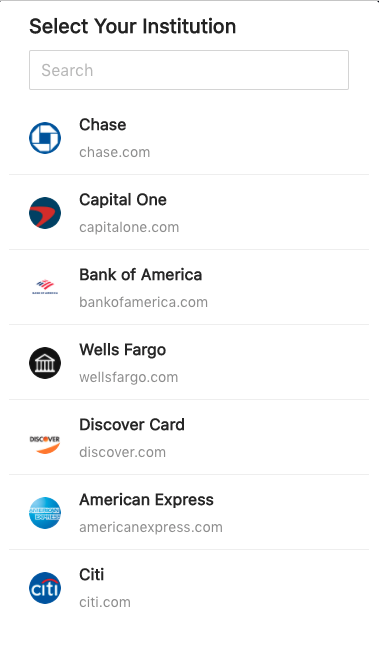
Launch Meld Connect Widget
Before you launch the Meld Connect Widget, make sure you have the connect token from the previous step.
Use the connect token to build the URL and show our widget to your customers. Below is a sample code:
<iframe src="https://institution-connect-sb.meld.io/?connectToken={{connectToken string}}" width="360" height="640" style="border: none;" />The iframe's default size is H=630 x W=360.
And below is the Meld Connect Widget your customers will see:
Launching in Test ModeIf you launch the widget url in your browser (no iframe), then at the end of making a connection you may see an endless loading spinner. This is only seen in this test mode, when you actually implement the widget, launch it in an iframe, and close it once the connection is done, there is no spinner.
Widget Flow Examples
Your customers flows will depend on the service provider selected and type of institution connection offered. There are two types of connections that service providers offer: OAuth and Standard. OAuth connections tend to be higher fidelity but require a pop-out to the bank's website for customer authentication. Sample flows are added for reference and expected behavior.
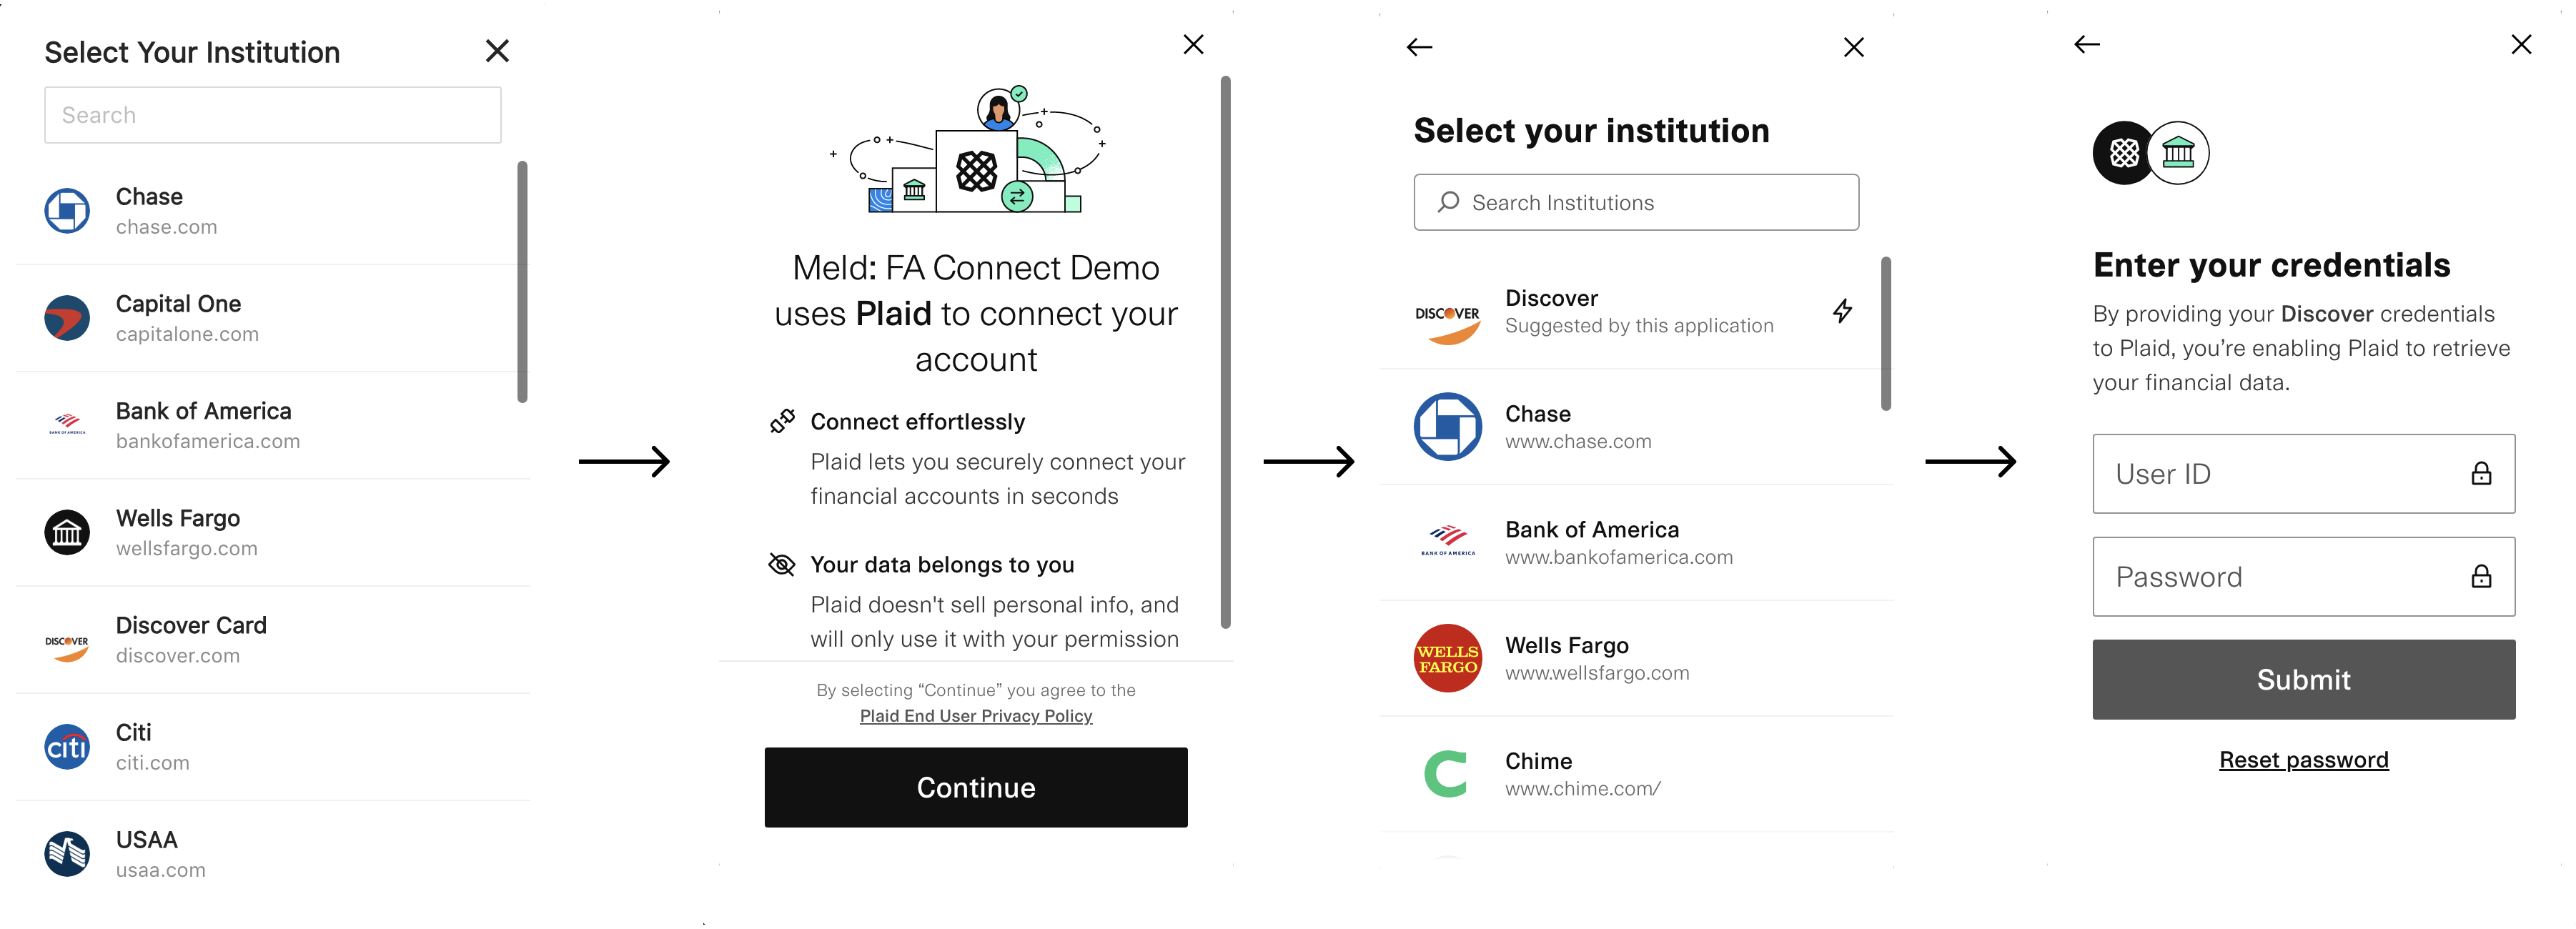
Service Provider: Plaid, Connection: Traditional
Note: Plaid requires their picker to be used in addition to Meld's picker. When possible, Meld signals to Plaid to provide a "suggested" lightning bolt next to the institution selected (in this case, Discover).
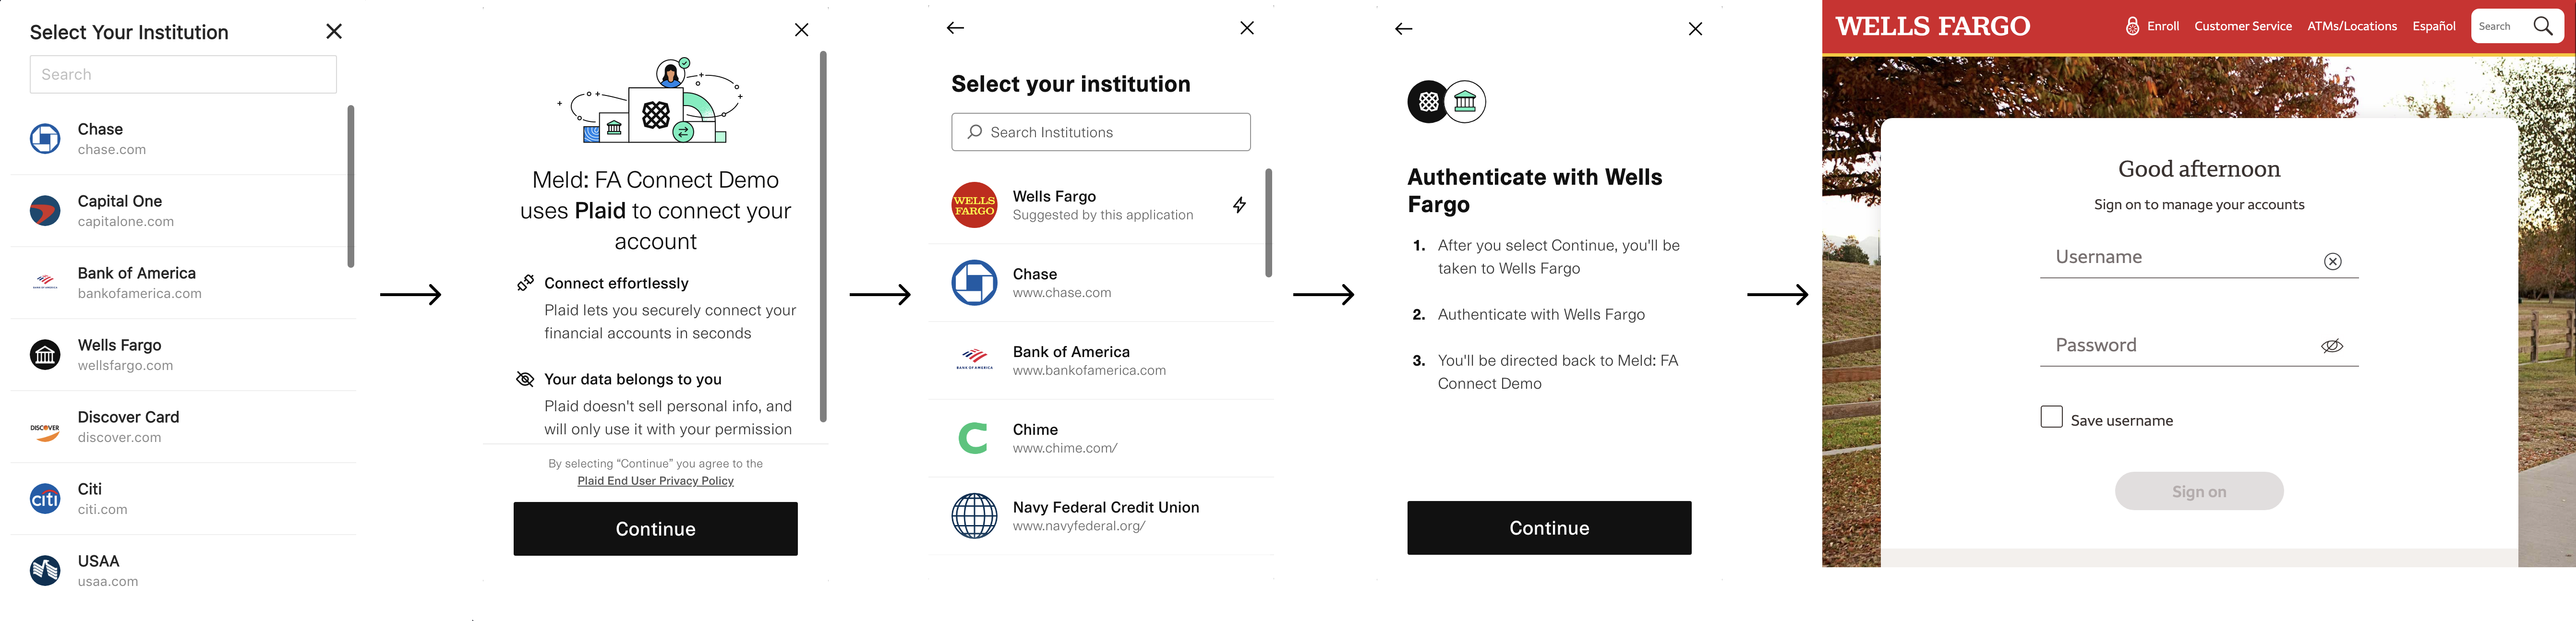
Service Provider: Plaid, Connection: OAuth
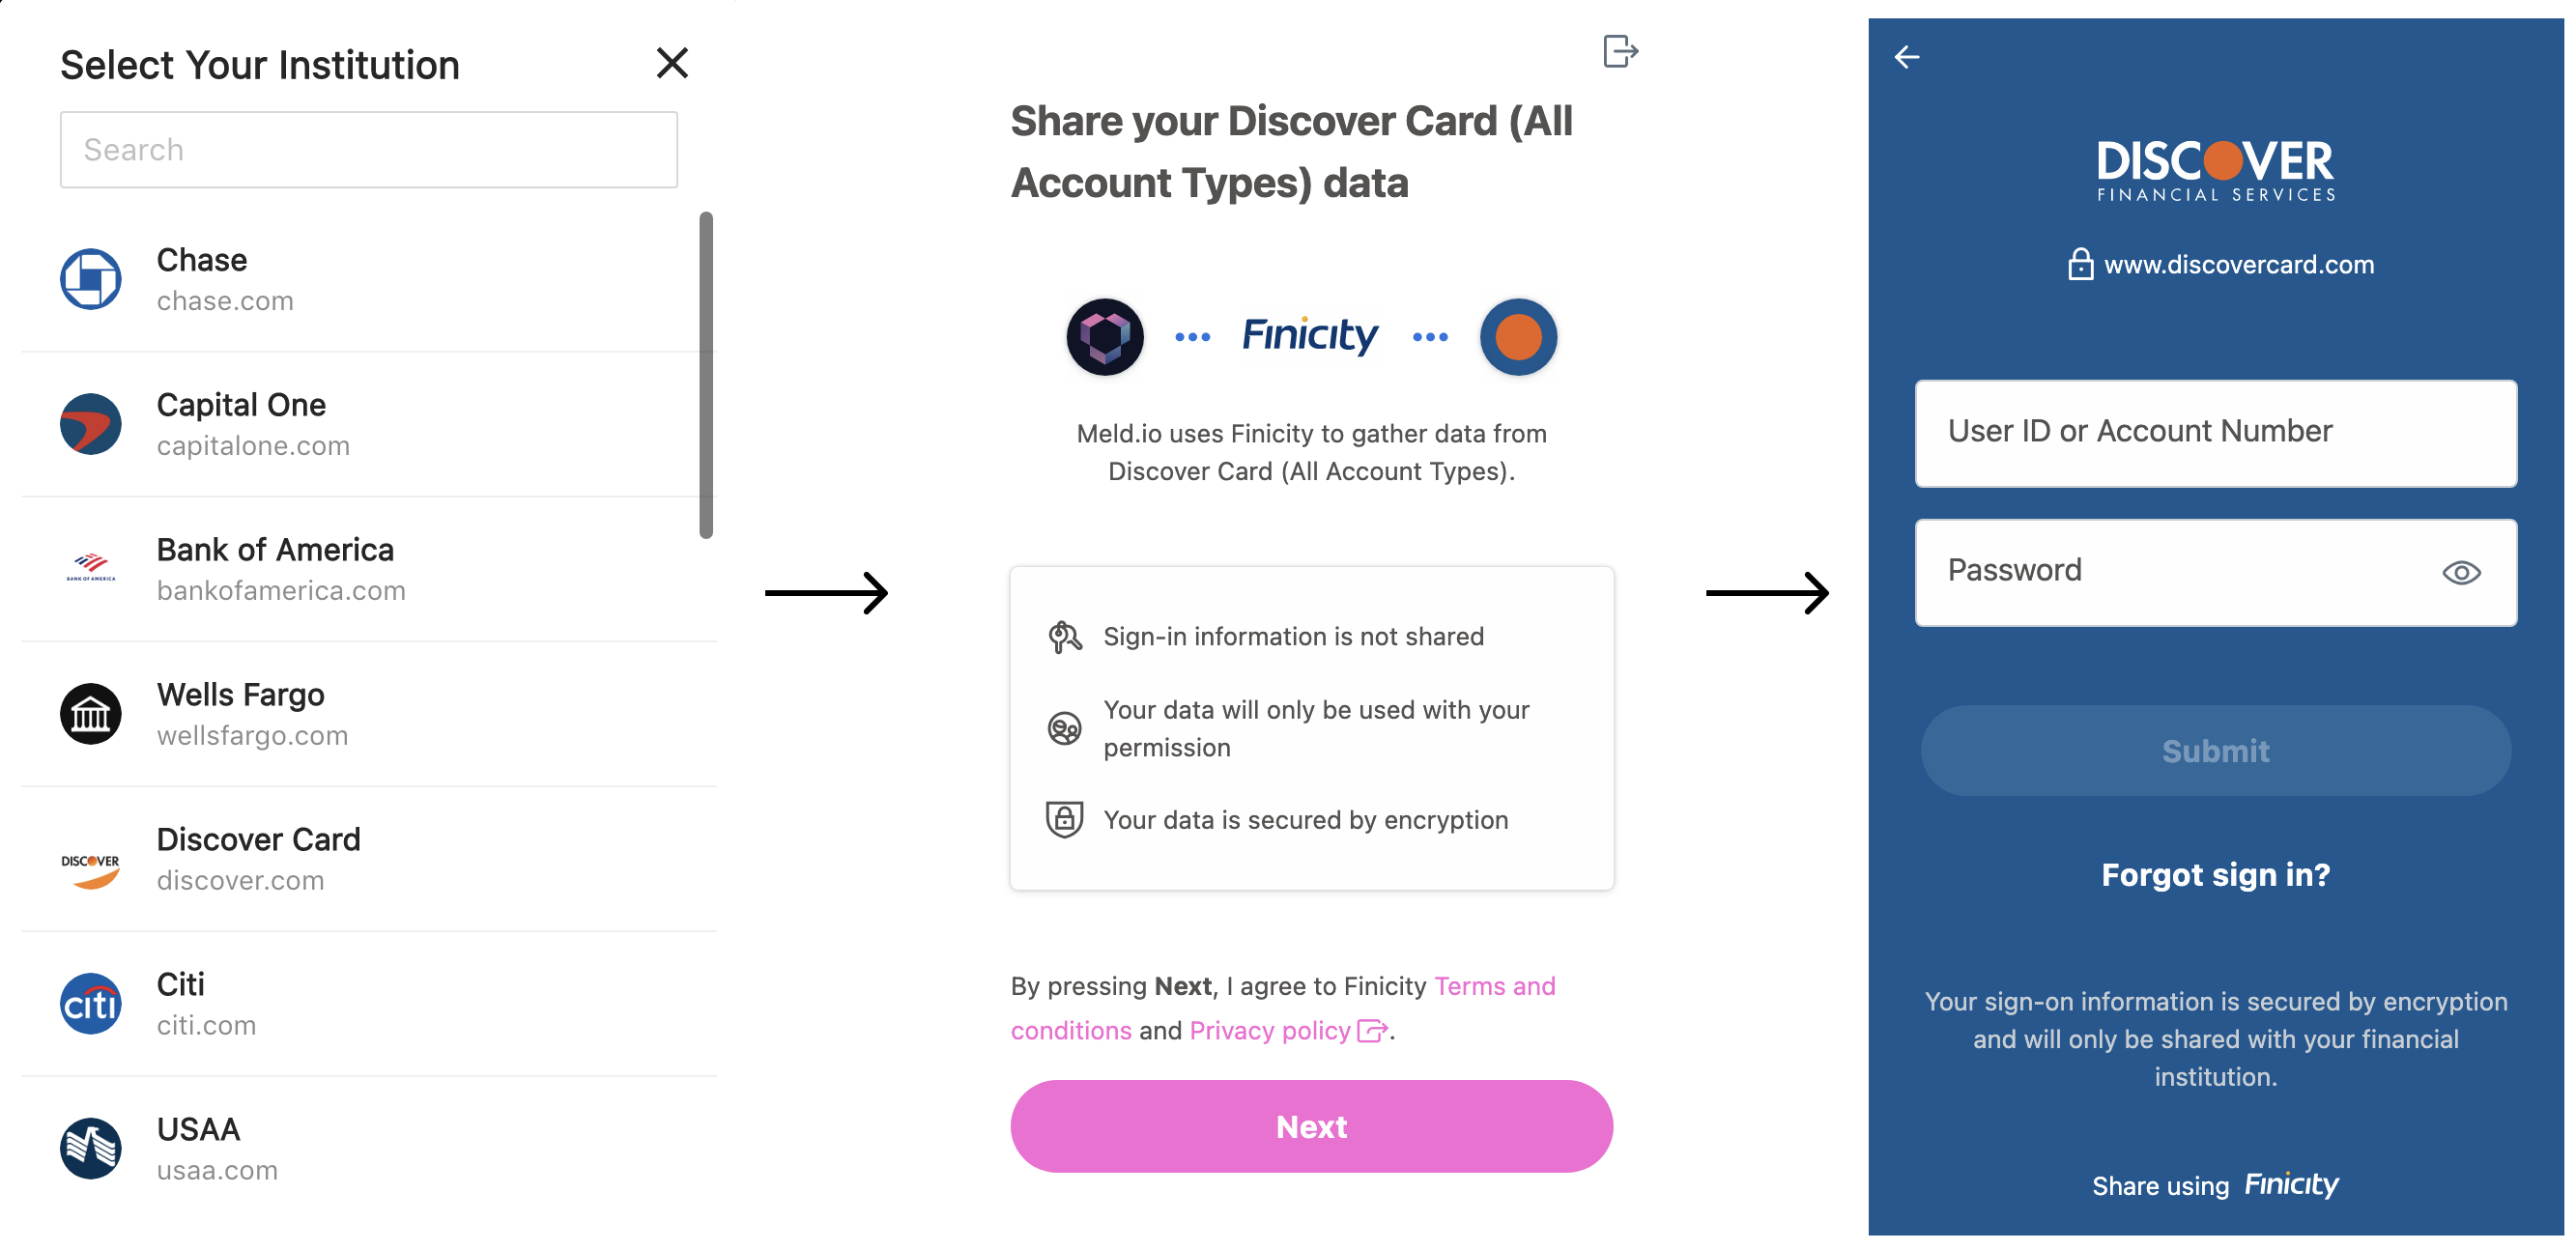
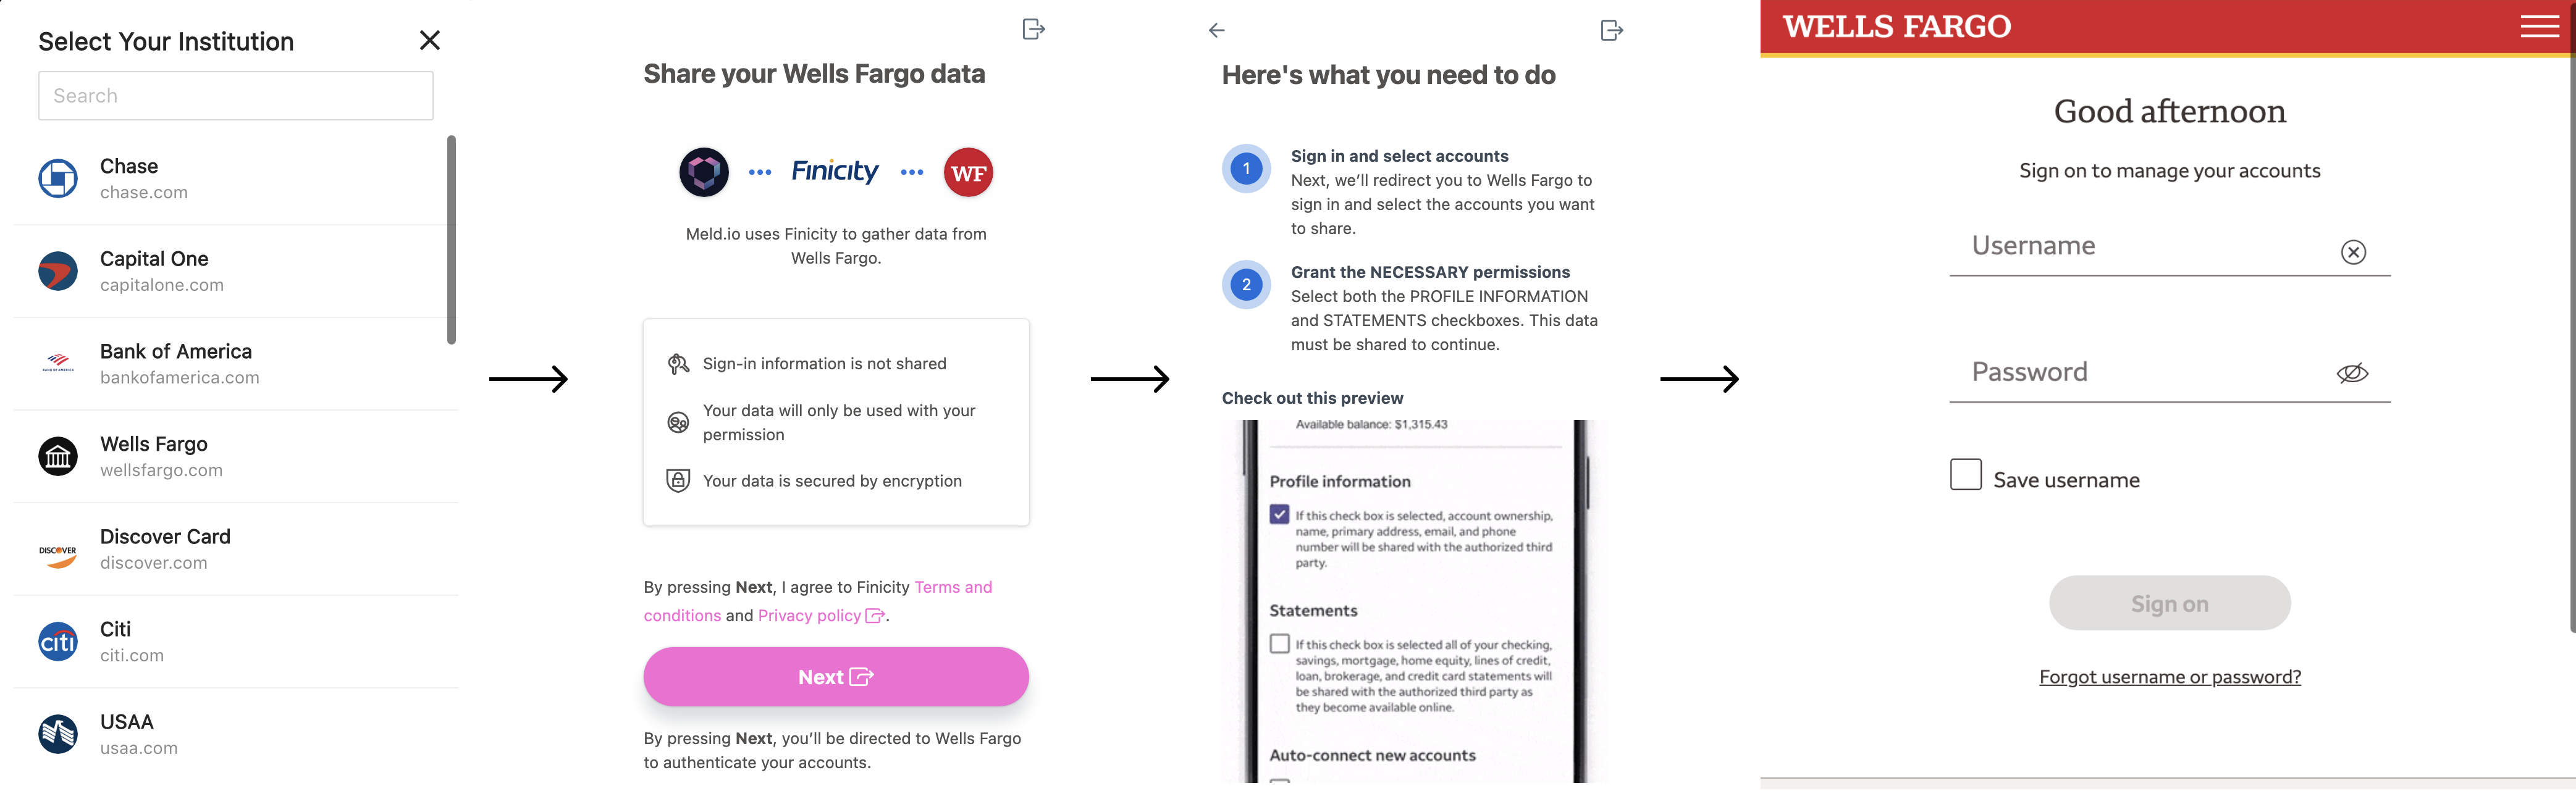
Service Provider: Finicity, Connection: Traditional
Note: Finicity users are directed straight to the institution login page and do not need to go through another picker.
Service Provider: Finicity, Connection: OAuth
Listening for Emitted Events
The widget emits several events, including errors, that you can listen for and use to trigger actions on your end. See more information on Widget Emitted Events and Errors.
Set up webhooks and notifications
You can receive notifications via webhooks whenever there are changes in financial accounts and transactions data. For instructions on setting up your webhook profiles, reference the Webhook Quickstart.
Example events include:
BANK_LINKING_CONNECTION_COMPLETEDBANK_LINKING_CONNECTION_DELETEDBANK_LINKING_CUSTOMER_ACTION_REQUIREDBANK_LINKING_ACCOUNTS_UPDATINGBANK_LINKING_ACCOUNTS_UPDATEDBANK_LINKING_ACCOUNTS_REMOVED
See the full list of bank-linking webhook event types in detail here
Mobile Optimization
Overview
In order to optimize your users’ mobile experience, if you are rendering the Meld Connect Widget inside of a modal window, you will need to apply a few styles to that modal window to ensure that the Connect Widget has the entire screen to render.
Example
Detecting whether your site is on a mobile device, and styling the modal, will vary based on which frontend framework(s) you are using. For our example, we are using React, and Ant Design along with Styled Components.
To detect whether the page is being viewed on a mobile device, we use react-device-detect:
import { isMobile } from "react-device-detect";To style our modal, we style the Ant Modal Component:
export const Modal = styled(ModalANTD)`
  padding: 0 !important;
  position: relative;
  ${isMobile &&
  ` max-width: unset !important;
    margin: unset !important;
    height: 100%;
    .ant-modal-centered::before {
      content: unset;
    }
    .ant-modal-content {
      height: 100%;
    }`}

  .ant-modal-content {
    border-radius: 8px;
  }
  .ant-modal-body {
    padding: 12px;
  }
`;
Resources
Updated 2 months ago